In a nutshell: Creating a 3D style mushroom illustration
Learning to use a 3D sculpting programme takes time and effort. I’ve learned a lot from tutorials on YouTube, but after three years, I still don’t know all the possibilities of this programme. Although it is becoming easier.
Here, I’m giving you a glimpse into the process of sculpting in Nomad Sculpt, and further processing it in Procreate.
Getting started…
When I got my iPad Pro and Apple Pencil in 2021, I immediately knew which two apps I wanted to try:
Procreate and Nomad Sculpt.
I had always been eager to learn 3D drawing, but ZBrush was too expensive for me. Nomad Sculpt is, of course, more limited in its capabilities, but it allows me to experiment and see how I like it. So far, I’m really enjoying it.
I also wanted to install Procreate. After seeing reels on Instagram, I got completely excited about the app. The interface is simple, and Procreate has a very intuitive workflow.
How did I end up drawing mushrooms? That actually started with the Funguary art challenge on Instagram. I wanted to draw unique mushrooms—real fantasy characters but in a realistic setting. And that’s how the combination of Nomad Sculpt and Procreate came into play..
What do you need for an illustration like this?
- Reference photos to get an idea of shapes and colours—I use Pinterest for this.
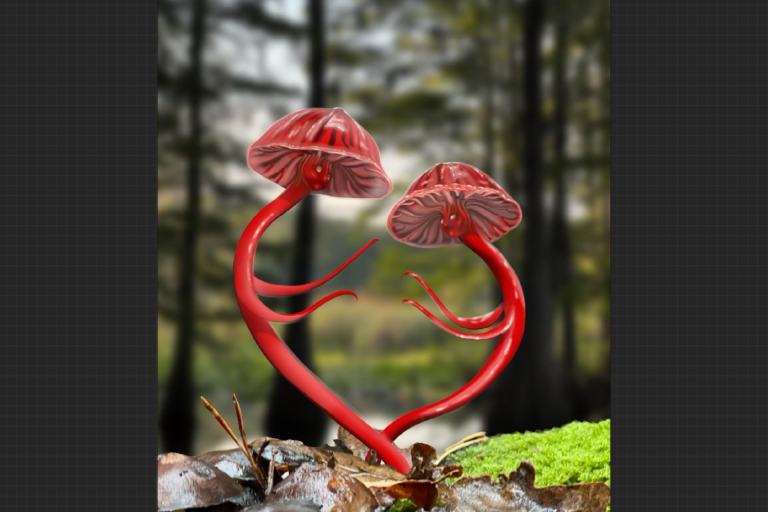
- Photos for the foreground and background—I use my own photos for these. For Love Bonnets, I used a photo taken in the Mastbos for the foreground, where the mushrooms are placed, and a holiday photo from Florida for the background.
- Tablet with the ability to run apps like Nomad Sculpt and Procreate. The renders take a lot of space, so be sure to use a tablet with enough memory.
- Nomad Sculpt app
- Procreate app
- Drawing pen. I use an Apple pen.
We start with a ball of virtual clay
Every new project begins with a ball of virtual clay. By default, mine is set to white, though you can also choose other materials or colours. The interface of Nomad Sculpt is fairly simple in terms of the tools you have. These tools are located on the right.
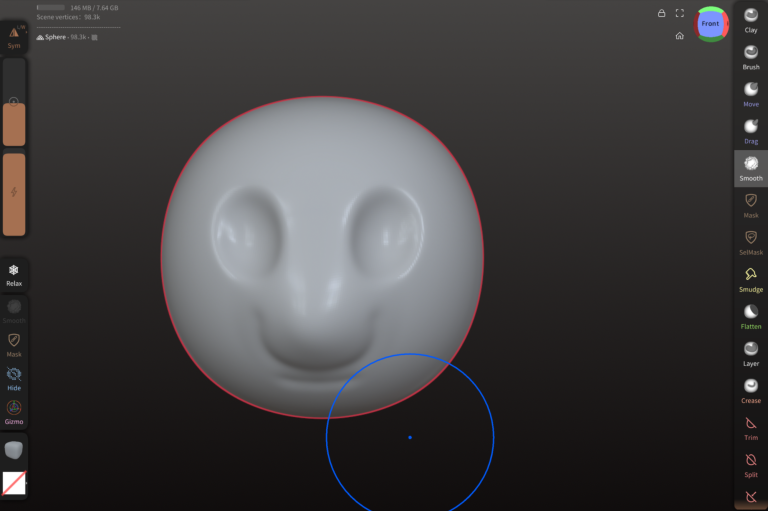
The basics of a face
The tools I use the most are clay, brush, drag, move, smooth, and crease. With clay and brush, you can add or remove material. When I create a face, I initially set the symmetry option. You can do this in the menu on the left.
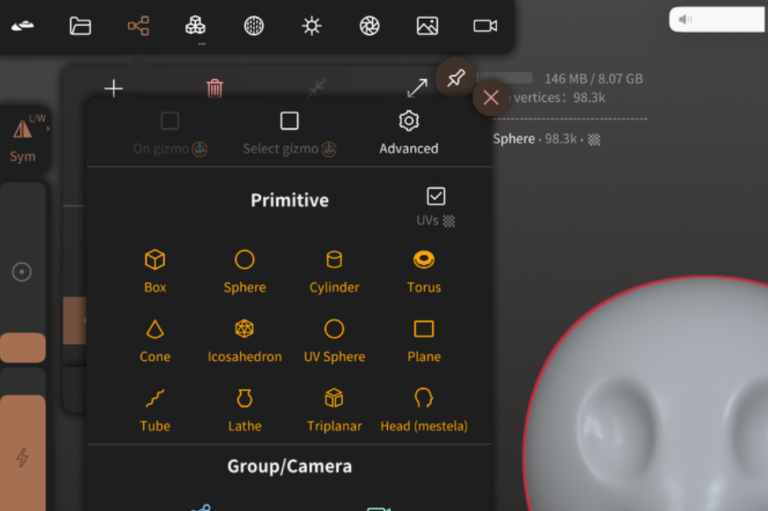
Adding body parts
Of course, a mushroom isn’t just a face, so for body parts like the cap, stem, and any arms, you’ll need to add a shape. You can do this in the main menu on the left under ‘Add’. There, you can choose from various shapes. For the mushroom cap, I use the cone shape.
Validating a shape
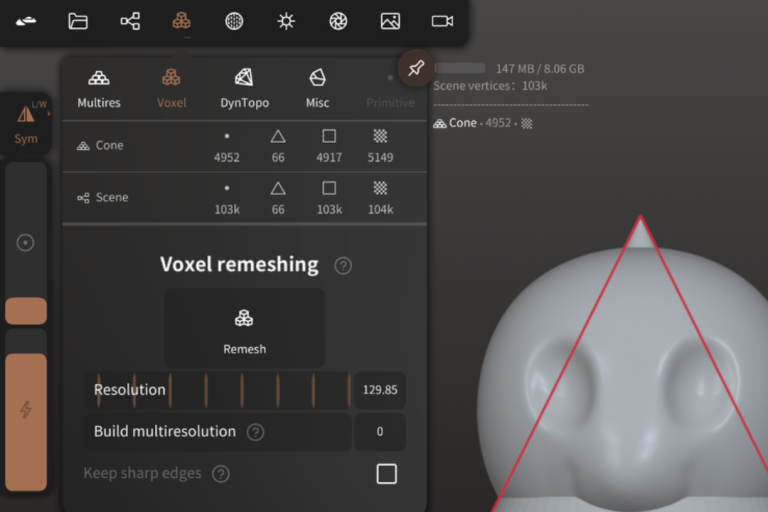
When I add a shape, a pop-up appears with a ‘Validate’ button. To edit the shape, you need to validate it. The shape is initially placed within the clay sphere, but using the Gizmo tool in the bottom left corner, you can move it in any direction, scale it, or flatten it.
With the voxel remesh, I increase the resolution of the shape for finer details. If you’ve already edited the shape before remeshing, it might become a bit rougher. In that case, use the smooth tool to refine and smooth out the shape.
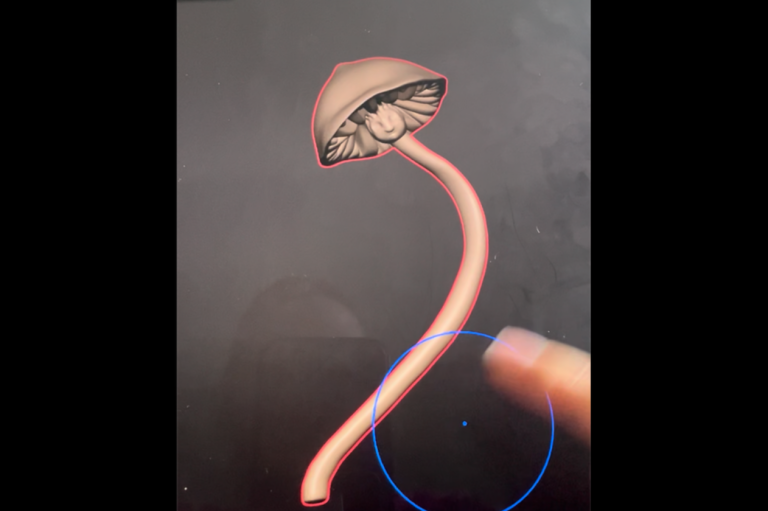
Building and sculpting the shapes
Creating a mushroom is an intuitive process for me. A natural shape is never entirely symmetrical. A mushroom cap can have dents or bumps, and the gills don’t need to be perfectly uniform in width. These details help achieve the most natural effect. Next, I give the mushrooms a red colour as a base for the illustration in Procreate. The gills contrast with the cap, so I give them a lighter colour.

Adding depth by adding a light source
In Nomad Sculpt, I add a light source that creates shadows depending on the direction of the light beam. Since I want to give the impression of sunlight in my illustration, I position the light source at an angle in front of the subject. As you can see, this casts shadows beneath the caps and arms of the mushrooms.
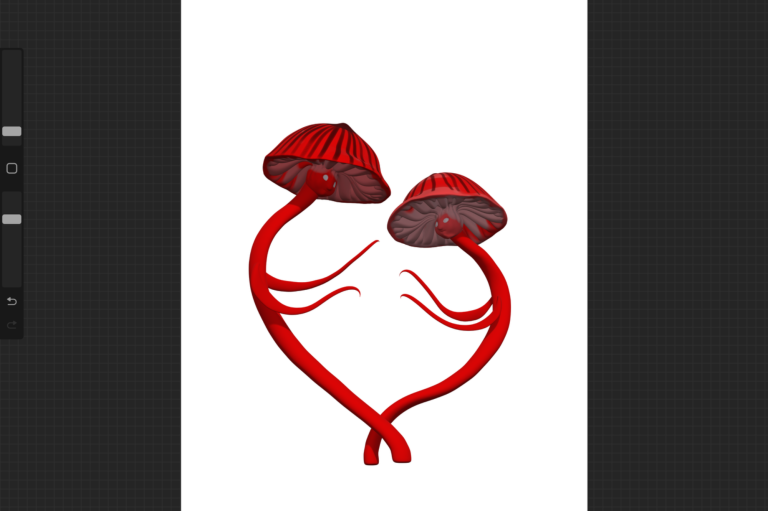
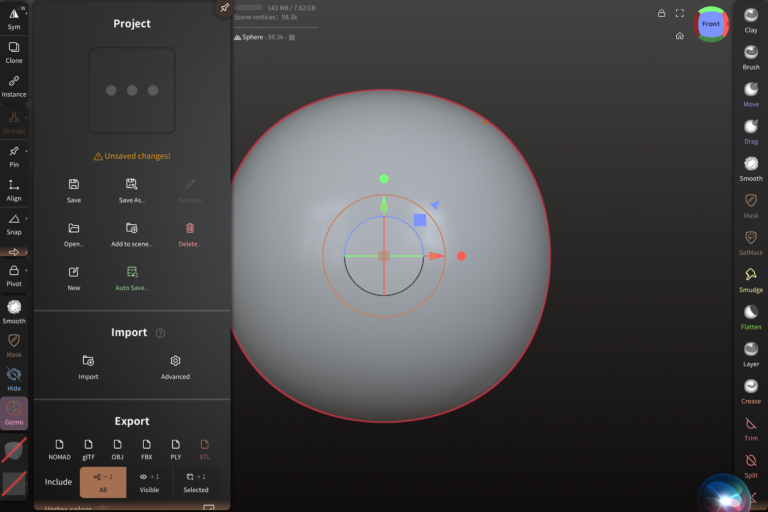
Exporting my model to Procreate
Once I’m happy with my 3D model, I export it as a PNG file. This ensures the background is transparent, so there are no outlines around the drawing. Exporting from Nomad Sculpt can be done directly to Procreate, which means that when you open Procreate, the file will immediately appear in the gallery. Beforehand, I selected a few holiday photos to use for the background and foreground. I import these into the file. The background becomes the bottom layer, while the foreground is placed on a layer above the mushrooms.
Drawing on my 3D model
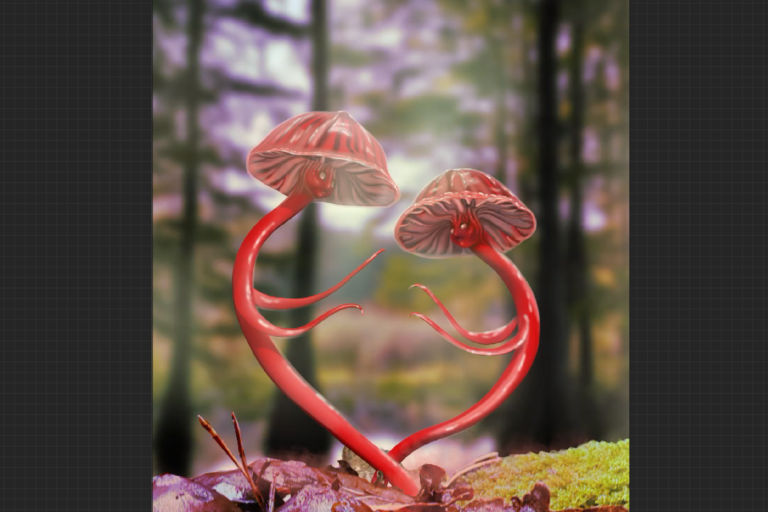
Using an airbrush brush, I add colour to the details. In Procreate, I’ve loaded a nature photo of a Ruby Bonnet and let Procreate generate a colour palette from it. For a more natural effect, I use the smudge tool in certain areas to blend the colours more smoothly.
Highlights and mood
With white, I create light spots on the mushrooms. The Ruby Bonnet has a sort of slimy layer that gives it a shine. I achieve this using an airbrush on a small setting in a new layer. I blur the initial light spots and then add smaller dots for extra contrast. To enhance the romantic atmosphere, I adjust the background and foreground images using colour balance.
A beam of light
Time for the final finishing touch: a beam of light that gives the impression of sunshine. For this, I create a new layer and use a light yellow colour along with a light leak brush. I set this to 69% opacity. Then, I blur it with the Gaussian Blur for a more natural effect. Since no light beam would naturally shine under the caps of the mushrooms, I erase it in those areas.
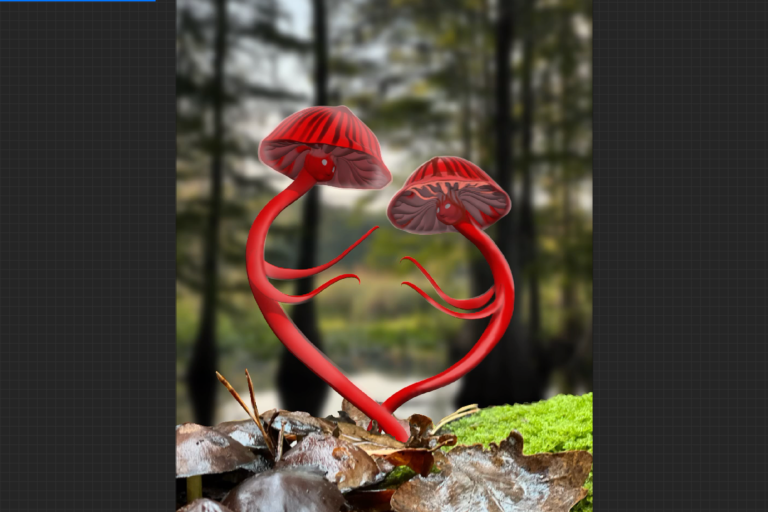
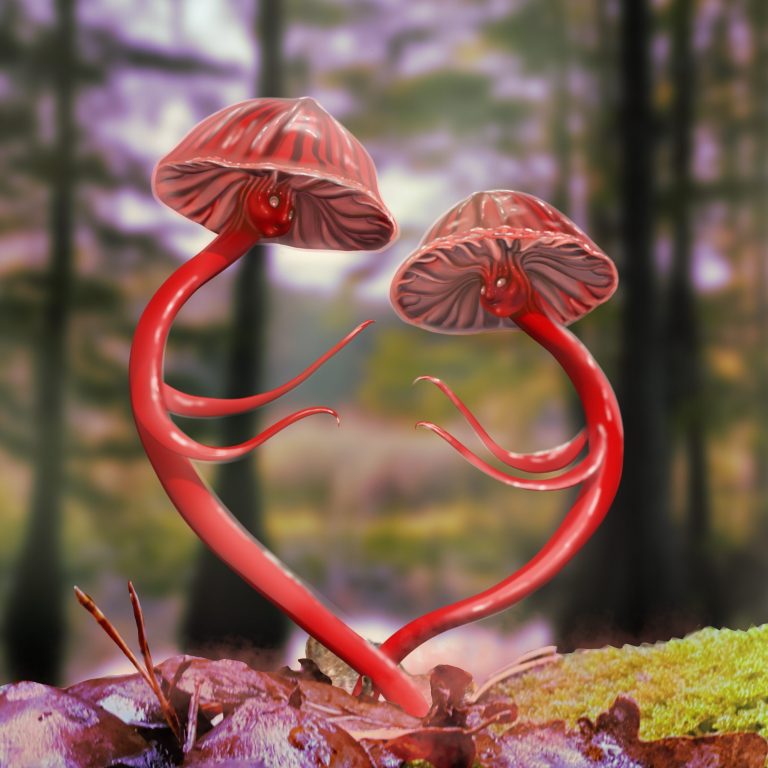
Finished illustration: Love Bonnets
Here’s the final result—my Love Bonnets illustration is complete. The idea was to depict the Ruby Bonnet mushroom as a lovestruck pair. After all, it’s for Funguary (February), and of course, February is the month of Valentine’s Day.
On top of that, I was feeling so down about everything happening in the world that I wanted to create something that radiates love. The Ruby Bonnets find each other and form a heart—there’s no clearer statement than that.
This is a thumbnail of the illustration so, to see it completely, head over to my gallery.
Of course, this is just a broad outline. Perhaps a tutorial will follow on YouTube—but that’s a step for another time…
Saskia Franken-Saers ©2025 All rights reserved
All content on this website is copyright Saskia Franken-Saers.
It may not be copied without written permission.
Use of this content for AI training purposes is not permitted.
We hebben je toestemming nodig om de vertalingen te laden
Om de inhoud van de website te vertalen gebruiken we een externe dienstverlener, die mogelijk gegevens over je activiteiten verzamelt. Lees het privacybeleid van de dienst en accepteer dit, om de vertalingen te bekijken.